

How To Draw A Hamster Pencil
Of all the trivial fluffy friends we love, hamsters are up there contending for the championship of cutest. With their tiny delicate anxiety, vivid eyes, twitching noses, and big ears, hamsters can be quite tricky to draw. Luckily, if yous want to create a realistic hamster sketch, you accept come up to the right place. With our easy-to-follow hamster drawing tutorial, you can master the basics and create a very beautiful, realistic hamster sketch.
Tabular array of Contents
- i A Step-by-Step Hamster Drawing Tutorial
- 1.1 Step one: Constructing the Torso of Your Hamster Sketch
- 1.ii Stride two: Constructing the Head
- one.3 Step iii: Amalgam the Face
- 1.iv Step 4: Constructing the Strawberry
- 1.5 Step five: Constructing the Arms and Paws
- ane.6 Pace 6: Amalgam the Feet
- 1.7 Stride 7: Constructing the Ears
- i.viii Step 8: Outlining the Caput of Your Hamster Cartoon
- 1.9 Pace nine: Outlining the Rest of the Body
- ane.10 Pace 10: Outlining the Strawberry
- 1.11 Step xi: Drawing the Facial Details
- 1.12 Pace 12: Adding Fur and Fine Details
- 1.xiii Pace xiii: Adding the First Coat of Colour
- ane.14 Pace fourteen: Calculation the Get-go Coat of Color to the Strawberry
- ane.15 Step 15: Calculation Shading to Your Hamster Sketch
- 1.16 Step xvi: Adding the Secondary Glaze of Colour
- 1.17 Footstep 17: Adding Highlights and Contours
- i.18 Footstep xviii: Adding Highlights to the Strawberry
- 1.19 Step 19: Completing Your Hamster Drawing
- 2 Oft Asked Questions
- 2.1 Tin can a Beginner Follow This Tutorial?
- 2.two Why do You Apply Construction Lines?
A Step-by-Stride Hamster Drawing Tutorial
We have put together this very like shooting fish in a barrel-to-follow tutorial to help you create a cute hamster sketch in no fourth dimension. The bully affair about this tutorial is that you lot can follow it using a range of mediums. If you are a watercolor artist or colored pencil artist, you tin chop-chop and effortlessly adjust the instructions. We've used a graphic tablet to create this tutorial, and so you lot tin see that adaptation is the proper name of the game. Learning how to draw a hamster is a fantastic way to do creating small and intricate details, like the nose, paws, and eyes. Y'all will likewise learn more about drawing realistic fur and the basics of construction lines and dimensions.
Step 1: Constructing the Body of Your Hamster Sketch
For many beginner artists, knowing where to showtime tackling a complicated subject similar a hamster is the most difficult role of the drawing stage. If yous were to start past drawing the caput and facial features, and then discover that you take non left enough space for the remainder of the trunk, you are likely to feel a piffling disheartened.
It is to avert these problems that we like to begin every animal drawing with construction shapes and lines. Using basic shapes and lines to plan out the primal shape of our animal before we add together any details, helps us make certain we have the right proportions and that we can fit our whole drawing on the canvas.
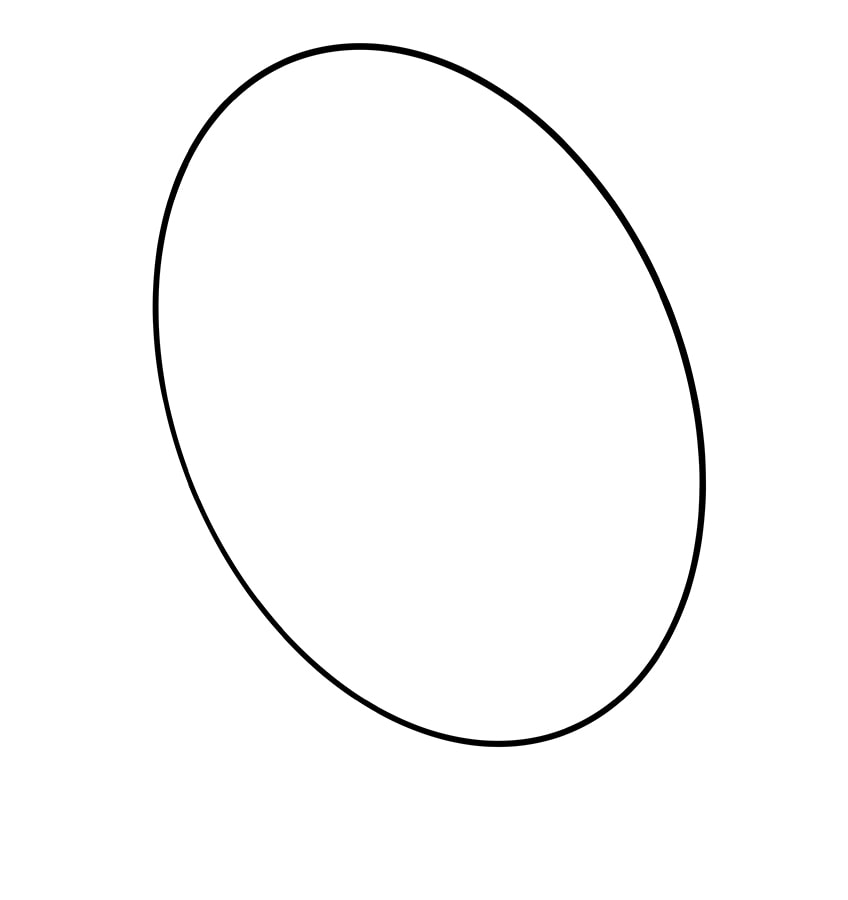
When information technology comes to cartoon animals, the virtually common shape we use as the foundation for the torso as a whole is an oval. You lot can probably encounter it coming, merely we are going to brainstorm amalgam our hamster sketch with an egg-shaped oval. You want the top of your oval to lean slightly to the left, as y'all tin see in our instance below. The most of import matter to remember in this first step is to make certain that at that place is plenty of space all effectually your oval, leaving room for other construction lines.
Stride ii: Constructing the Head
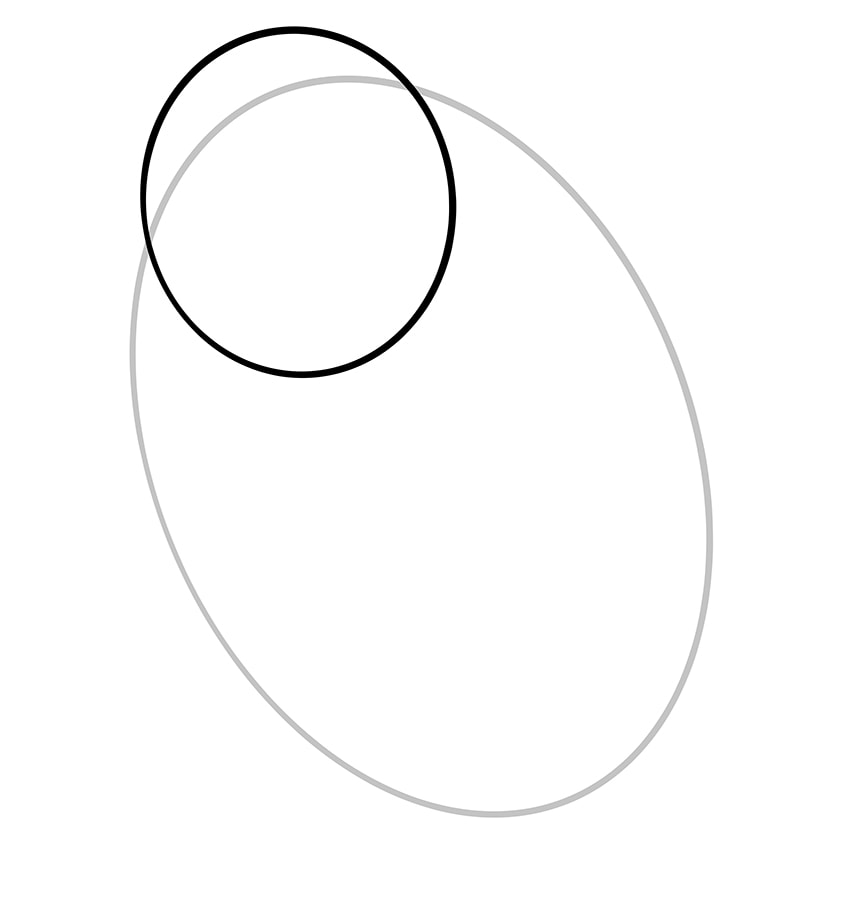
Because we are drawing the hamster sitting on its back legs, the caput overlaps quite significantly with the torso. You lot can imagine that the hamster'due south shoulders are behind its head, as it is sitting slightly hunched over. As a upshot of this perspective, you demand to brand sure that the oval you utilise for your head overlaps with the top of the main torso oval quite a lot.
The oval you use to represent the head should not be every bit long as the one you drew for the master body. In fact, the caput should exist more than of an uneven circle than an oval.
Step 3: Constructing the Face
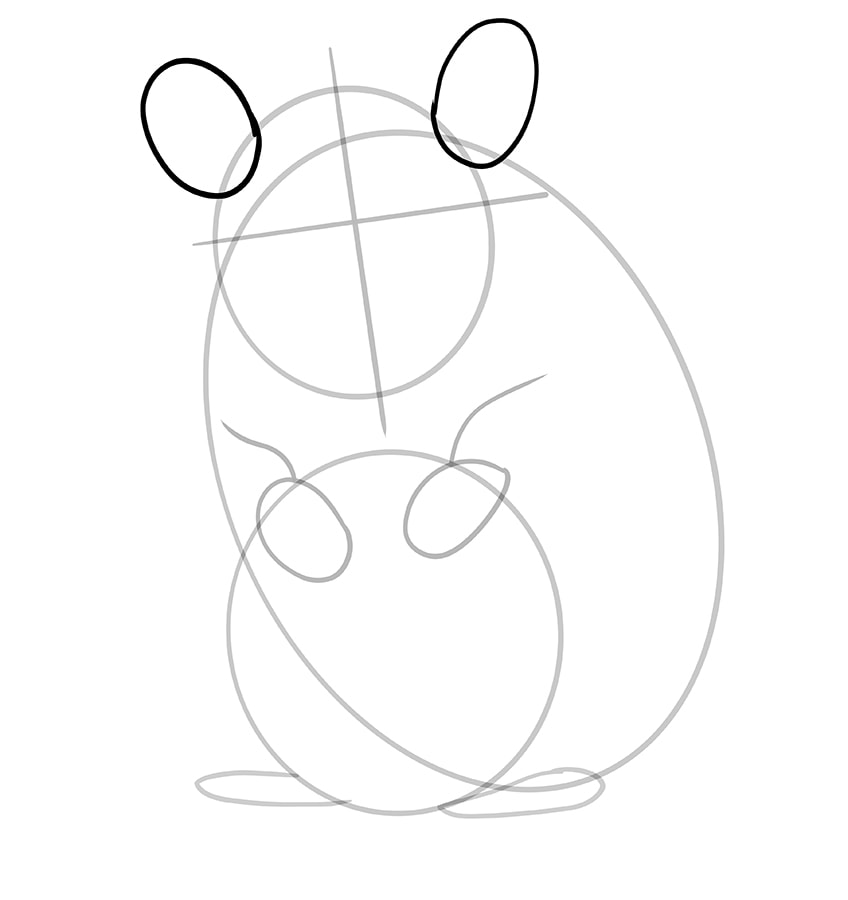
As a upshot of the position that we are choosing to depict the hamster in, we are drawing its unabridged face. The most of import part of cartoon any face, be it human or creature, is to get the dimensions and placement of all the features spot on. If the eyes are slightly as well far apart, or the nose is too high, you tin very quickly create a foreign-looking creature! To avoid any of these mistakes, we are going to describe some construction lines in the caput to help us plan out the facial features correctly. But in a higher place the primal signal of the head circle, describe a line that crosses the head oval horizontally, and and then a vertical line that bisects with this line in the middle.
If you look at our example beneath, you will see that the facial structure lines are not horizontal and vertical in the traditional sense, merely relative to the angle of the head circumvolve.

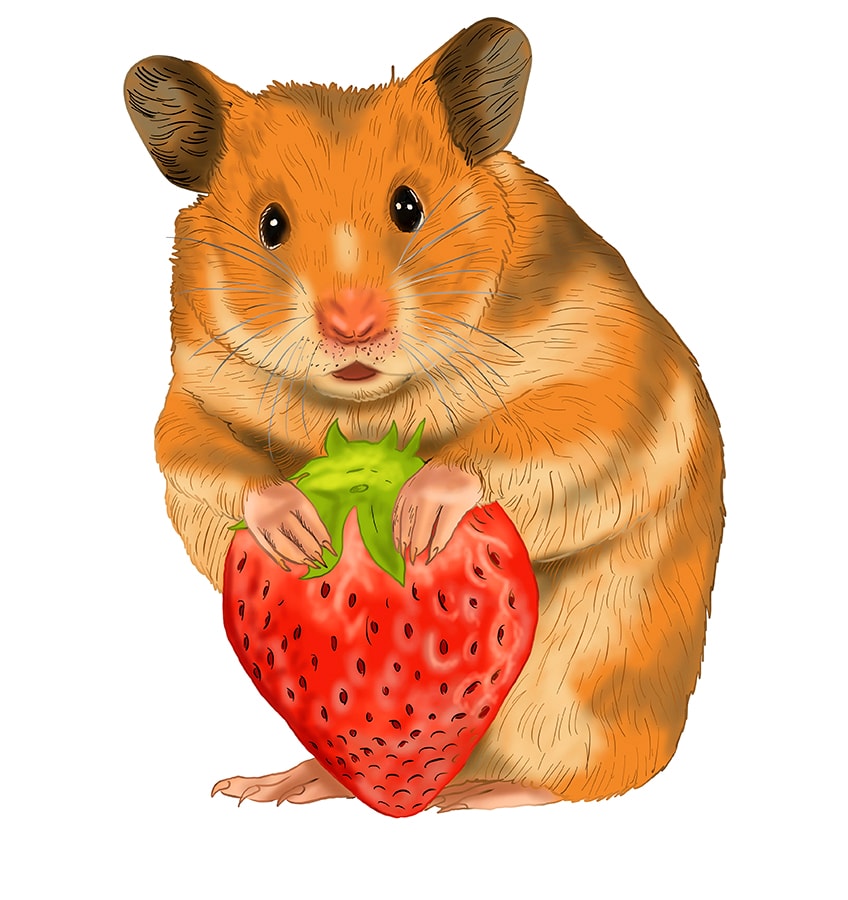
Step 4: Constructing the Strawberry
You volition be able to run into in the main prototype for this tutorial that the hamster drawing features a big juicy strawberry. The addition of the strawberry is a stylistic selection, making it easier for the states to depict the hamster'southward hands. If you lot do not fancy including the strawberry, you are welcome to leave it out, merely if you want to follow along with usa, nosotros are going to use a slightly oval shape to construct the strawberry.
While the other two oval shapes that nosotros have used so far have been angled slightly to the left, the strawberry structure circle tin can exist directly upright. You lot want the strawberry oval to overlap quite significantly with the trunk of the hamster, and sit just to the left of the lesser point in the main body oval.

Step v: Constructing the Artillery and Paws
It may be tempting at this stage of the hamster cartoon tutorial to condone the structure lines and just outset drawing the arms fully, merely when information technology comes to the step where nosotros draw the full outline, you will be grateful to take stuck with the process!
For the arms of the hamster, you are going to utilize two inverted lines that bend down and into the heart of the primary trunk oval. You lot desire the ends of these arm lines to meet the outline of the strawberry structure circle. At the end of these arm construction lines, draw two slightly uneven oval shapes that overlap the strawberry shape significantly.
In the side by side few steps, we are going to use these uneven ovals to help u.s.a. draw the fingers on the hamster'south paws.

Step vi: Amalgam the Feet
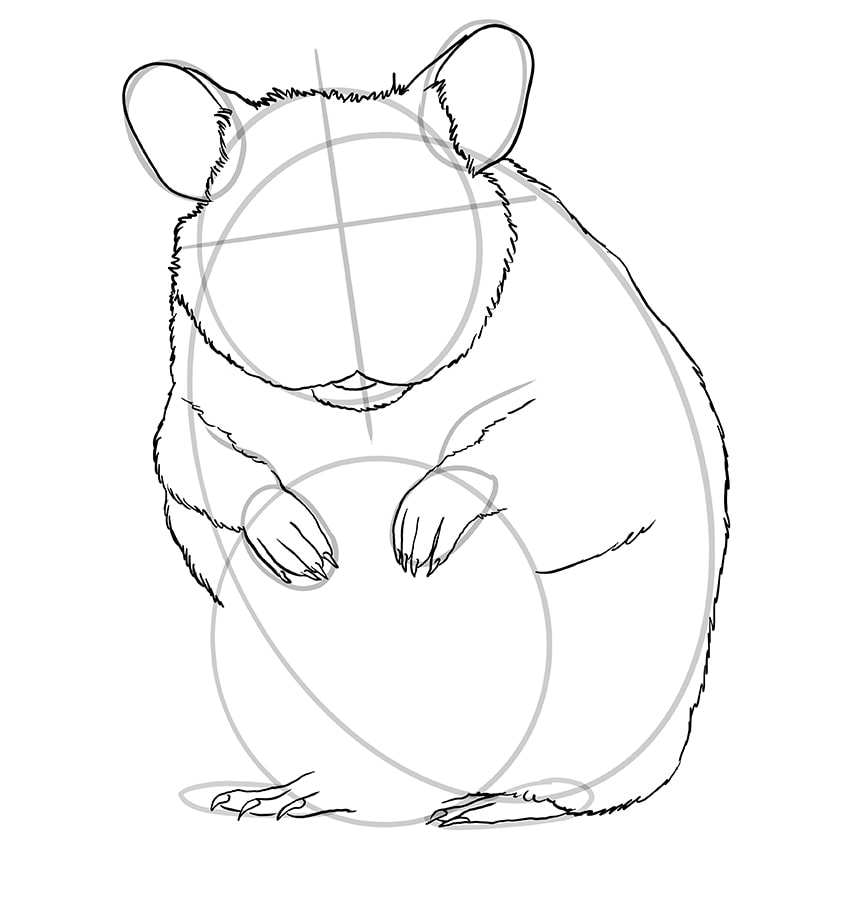
This pace is relatively straightforward, as you are simply laying downwardly the foundational shape of the two lesser feet sticking out from under the hamster's torso. The feet, which are facing outwards similar a ballet dancer, can be represented by two narrow and uneven ovals. Both ovals should start on the strawberry construction oval.
The foot that is on your right side, tin can overlap slightly with the primary torso oval, while the 2d should only exist partially visible, as the strawberry will be blocking our view of it.

Step 7: Constructing the Ears
This seventh footstep is another very simple step, and it is the last construction step before we begin to fine line the terminal shape of the hamster. For the hamster's ears, you are going to apply two elongated and almost square ovals. For the right ear, you want to have the bottom of this oval overlap with the point of overlap between the caput and body structure shapes. For the left ear, just find the equivalent spot on the left side of the caput.
The hamster'southward ears face outwards slightly, so you want to make sure that both of your ear structure shapes slant slightly away from the facial center line.
Step eight: Outlining the Head of Your Hamster Cartoon
Information technology is finally time to start putting our construction lines to apply to create the final outline of the hamster'southward trunk. We take split the outlining process into several stages because the hamster is quite intricate and we desire to brand sure each stride is as clear and easy-to-follow as possible.
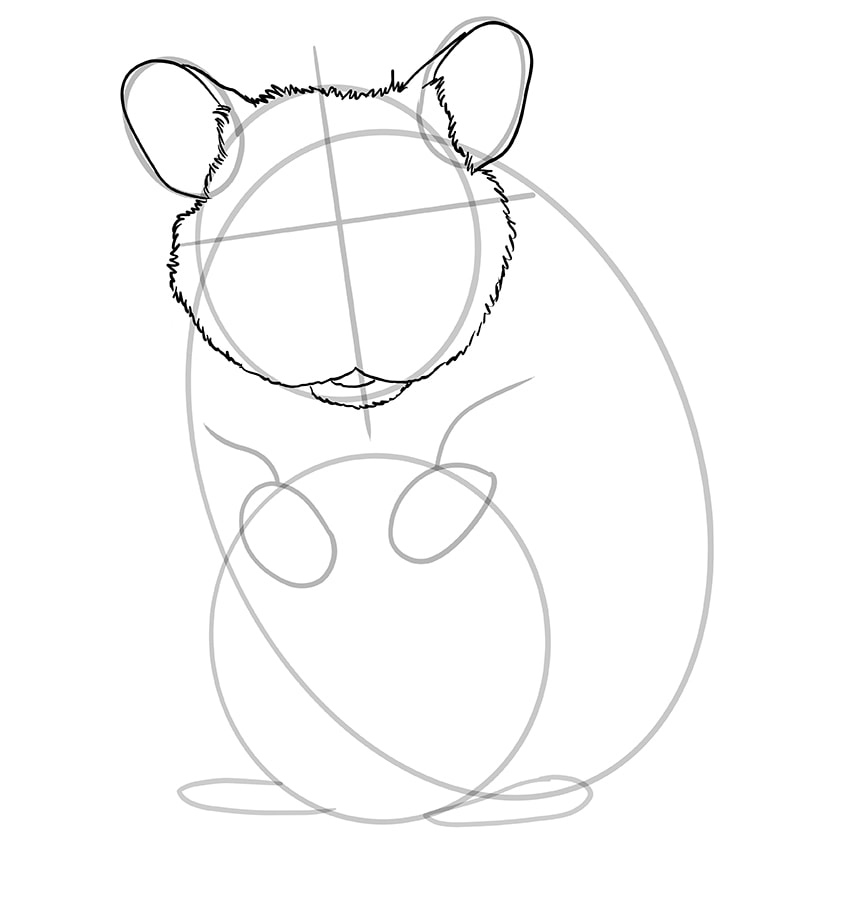
Using the general shape of the structure line to assistance you, begin past using short strokes of your pen to draw the very top role of the hamster'due south head. You want to give the impression of fur with these brusk strokes. When yous have completed this top part, accept a polish line onto each of the ear construction lines. Y'all can outline the ears with smoothen lines, but when it comes to the bottom of the ear ovals, create lines using brusk strokes that cut across the bottom of the oval. You lot can and then continue to use these short strokes to outline the residue of the face.
You tin see from our example that you lot should not follow the shape of the construction oval exactly. Around the cheeks, you can take the line out significantly further than the construction line to create the chubby cheeks of your hamster.
When y'all get to the bottom of the hamster'southward face, you tin bring the outline up slightly to meet on the cardinal face construction line. Finally, draw two oval lines beneath this indicate to represent the oral fissure and lower lip. Both of these lines can exist slightly furry.
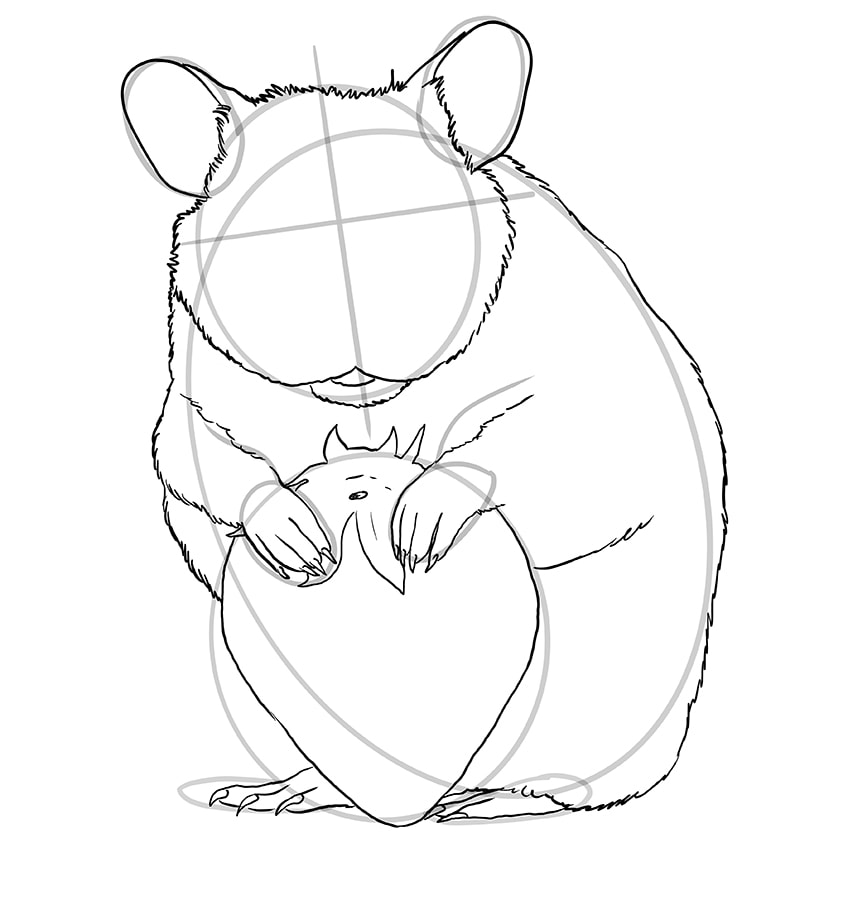
Step ix: Outlining the Rest of the Trunk
In this step, you are going to utilise all the other structure lines to outline the shape of your hamster's entire body. To create the realistic impression of fur, you need to utilize the same brusque strokes to complete the whole outline, excluding the hands and feet.
As with all drawing tutorials using construction lines, the flim-flam is non to follow them as well closely. For the outline of the main body, for example, you can add a few lumps and bumps to make the outline more than realistic.
For the hands and feet, use the construction shapes to help you lot shape the features. Draw four adequately mesomorphic fiddling fingers on each of the easily, and three on each foot. Make sure that y'all draw the right foot with the toes facing the left! Finally, add some sharp picayune nails to each finger and toe.
Step x: Outlining the Strawberry
Considering we accept the construction line, outlining the strawberry is very easy. You can also use the position of your hamster's hands to help you describe the strawberry, making information technology look like the hamster is property onto the sweet juicy fruit. You can likewise use the feet to help y'all shape the lesser of the strawberry.
To add together the last touches of realism to the shape of your strawberry, add some leaves and even a small stem to the meridian.
Pace 11: Drawing the Facial Details
In this step, we are going to use the construction lines in the face to describe the hamster's eyes, nose, and whiskers. Begin by drawing two eyes on the horizontal construction line. Yous want these eyes to be slightly almond-shaped, with a wider base of operations and a more pointy pinnacle. Exit one or two blank dots inside the eye, to correspond the reflection of light in the iris.
Farther downward the vertical construction line, just higher up the rima oris, draw ii curved lines that look a little like a "3" lying on its back. These curved shapes represent the nostrils of the hamster. Effectually this nostril, add together some dotted details, and stop the face up by adding quite a few whiskers on either side of the nose.
When you are happy with your hamster's face, you tin erase all the structure lines that are withal visible.
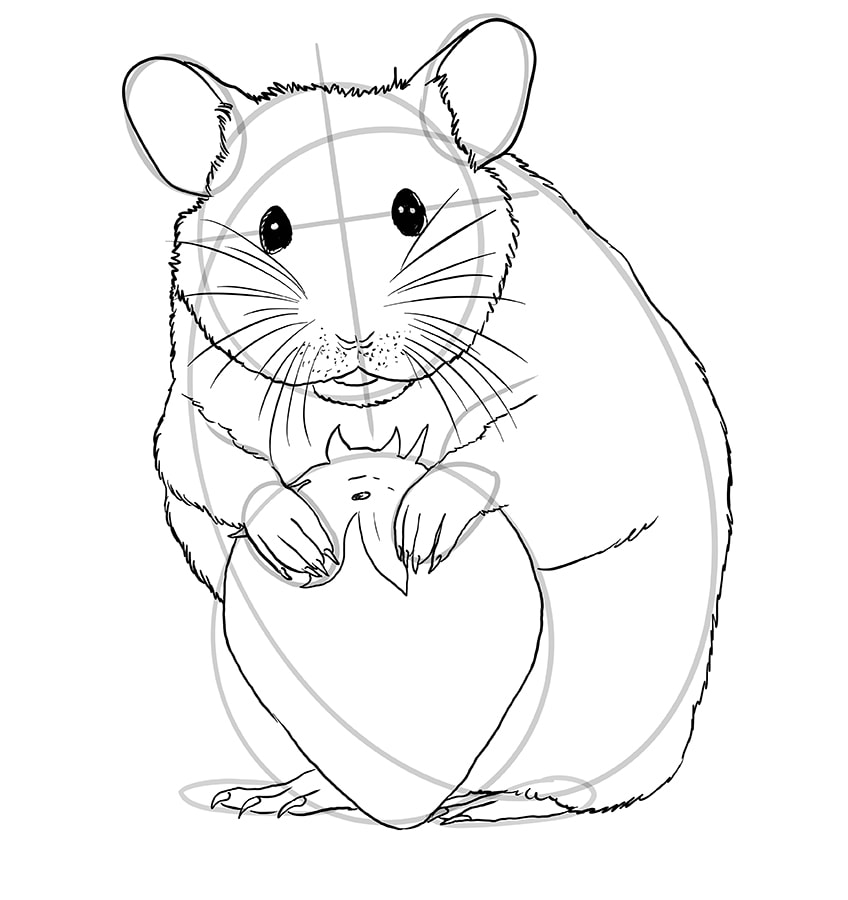
Step 12: Adding Fur and Fine Details
In this step, nosotros are going to add a fur texture to the whole body of the hamster and add the pip details on the strawberry. For the strawberry, draw some slightly uneven oval shapes throughout the body of the strawberry.
Begin adding fur to the caput, with a few gentle hairlines flowing out and upwards from the heart of the face. You desire to make certain that the fur flows equally in all directions around the facial features. You lot can also add some fine streaks of hair within the hamster'southward ears. Continue to add fur throughout the residuum of the hamster's torso, but do non add fur to the easily or feet.
To make your hamster look as realistic as possible, y'all should follow the curves of the trunk with the hairlines. You lot can also use a range of longer and shorter lines to create natural variety.
Stride 13: Calculation the Showtime Coat of Color
When it comes to achieving a natural look with the colour of your hamster drawing, nosotros need to piece of work in several layers. Nosotros begin with a base coat, and then we will add highlights and shadows for depth and realism. For the base of operations glaze, you should cull quite a light brownish shade of paint or pencil. You tin utilise this color to color the entire trunk of the hamster, including the hands and feet.
Rmemeber non to colour the strawberry in!
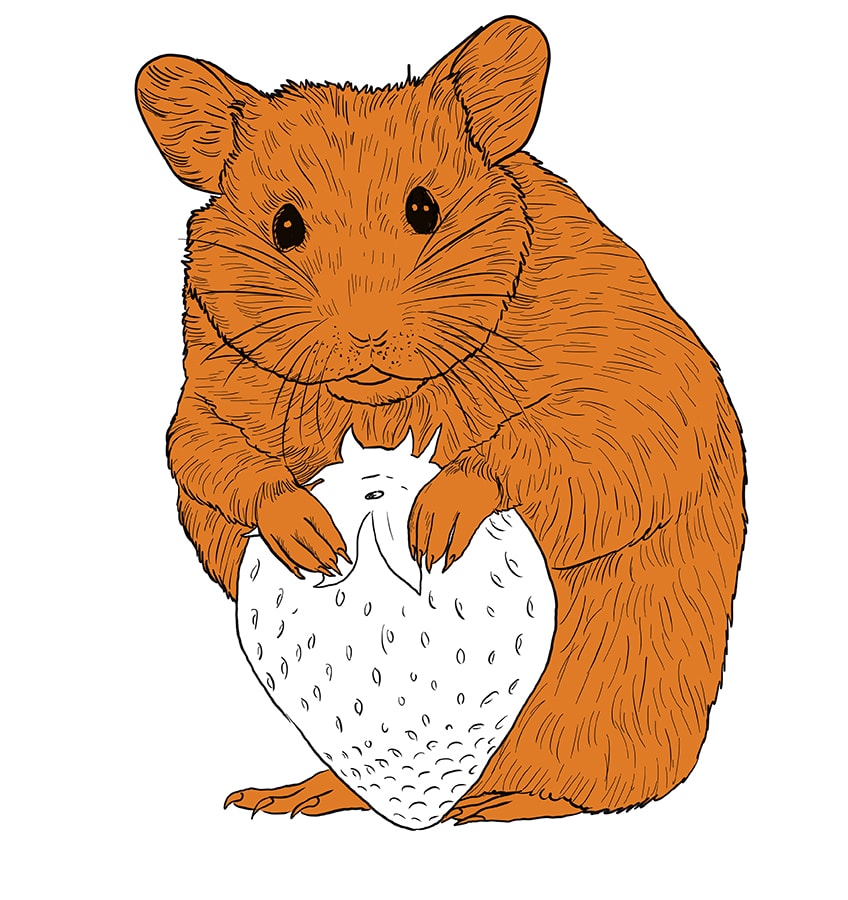
Pace 14: Calculation the Beginning Glaze of Color to the Strawberry
We are also coloring the strawberry in two stages. In this first strawberry coloring step, you can utilise light light-green for the leafy top and a nice bright ruddy shade for the body of the juicy strawberry.

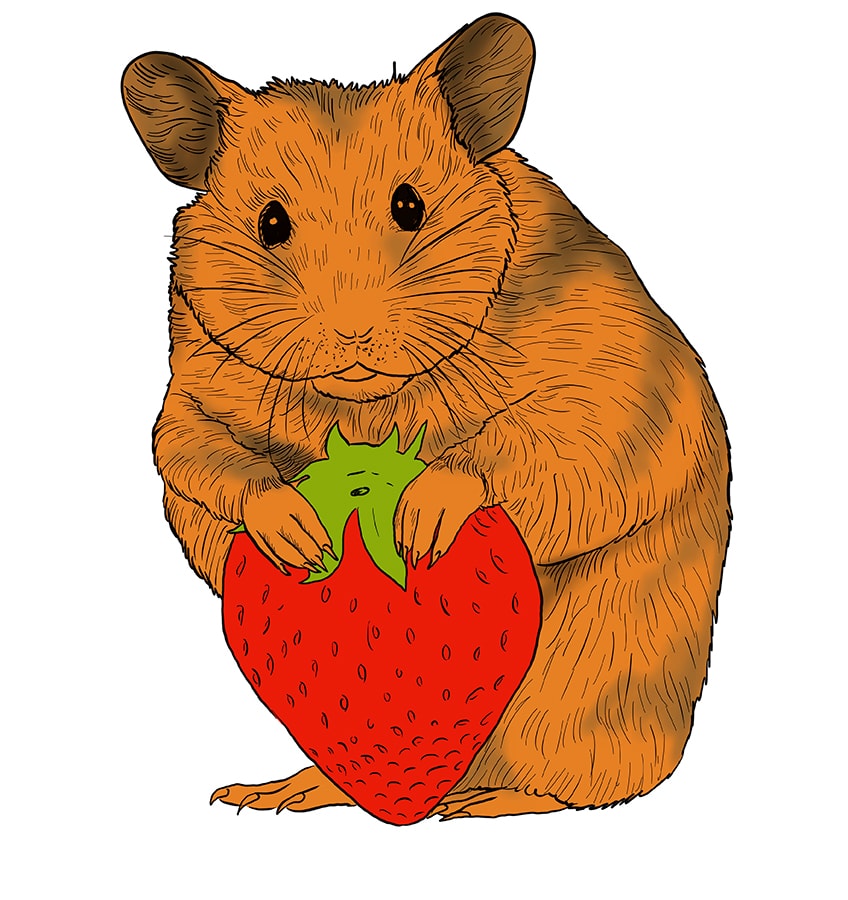
Step fifteen: Adding Shading to Your Hamster Sketch
Shading is an essential feature of any realistic drawing. To add shading to your hamster drawing, detect a light black or night brown shade. Using a very light affect, add a little shading to the inside of the hamster's ears, nether the hamster'south chin, under the arms, on the top of the head, around the nose, and around the hamster's back. You tin can likewise add a touch on of shading around the base of the hamster's hands, and in betwixt the fingers.
The trick with shading is to brand sure that it is very light. Because y'all are calculation a night colour, it is like shooting fish in a barrel to over do it chop-chop. It is always best to start every bit lightly as possible, because you can always add more.
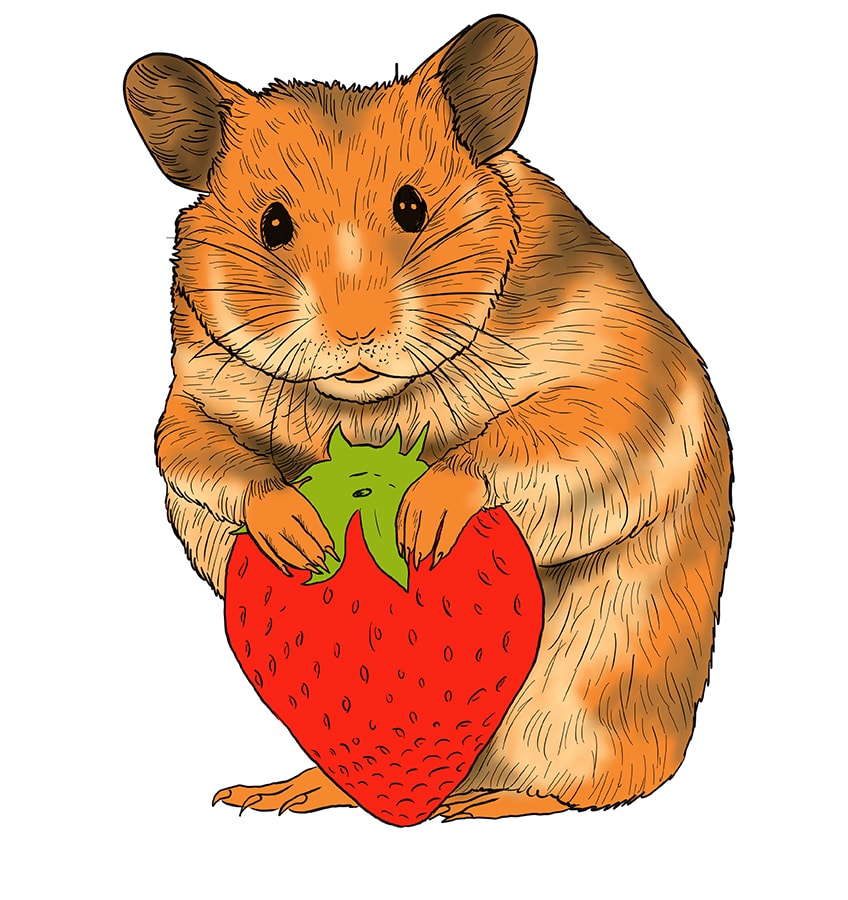
Step sixteen: Adding the Secondary Coat of Color
For the second coat of color, you should utilize a calorie-free biscuit or white shade. Y'all want to focus this lighter color on the front of the hamster's torso. On the face, add the light color around the hamster'southward oral cavity, around the nose, and on the bridge of the nose. You tin then add together the calorie-free color to the front end of the hamster'south chest, on the bottom of the arms, and on the lesser of the hamster's belly.
Step 17: Calculation Highlights and Contours
For a little more shading, utilise a low-cal grey shade and gently contour the inner ears and the face up. Brainstorm with a soft brush using greyness paint to add gentle contouring to the inner ears and lightly around the face up. Next, choose a lite pinkish or peach shade to color the olfactory organ, and and then use the greyness again to contour the nostril holes. You can use this same shade of pinkish to colour in the hamster'south rima oris.
For the hands and feet, apply a patchy coat of white paint followed by a coat of light pink shade. You can terminate this step by using a nighttime blackness color to darken the optics and adding a touch of white to the reflection spots.

Step 18: Calculation Highlights to the Strawberry
To make the strawberry look a little more realistic, we are going to add shadows and highlights. Using a very small castor and a dark shade of red, colour in the very middle of each pip. Once yous accept each of your dark pips in identify, use a white shade to lightly create curved frames effectually each pip. The top of the strawberry should have the lightest highlights, and you lot tin can use fewer highlights towards the bottom.
To add together realism to the strawberry leaf, add a footling yellowish highlight.
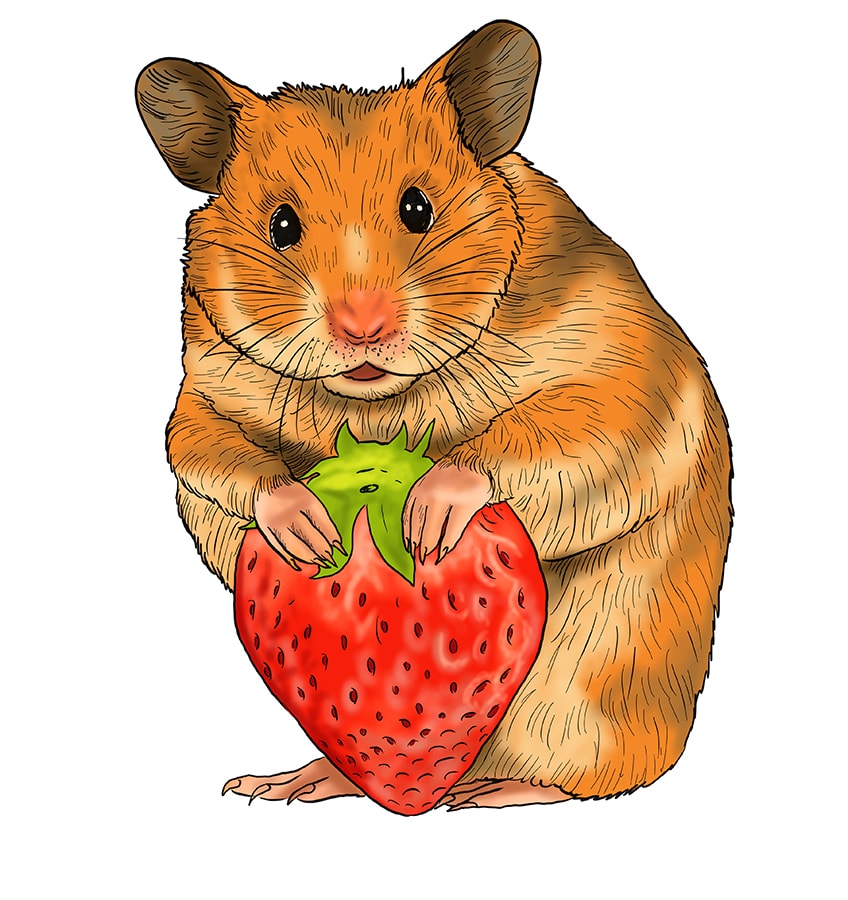
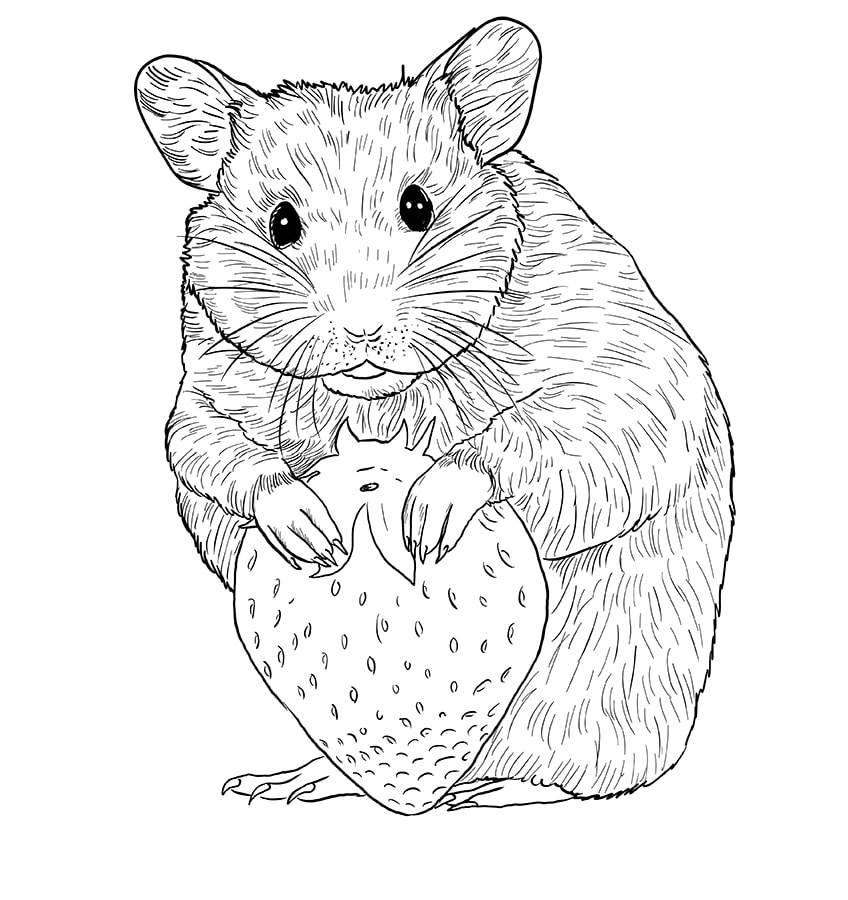
Step 19: Completing Your Hamster Drawing
If you are happy with your cartoon, you lot can leave information technology at that. For a more realistic finishing impact, withal, y'all tin can remove the outline. You can either erase the outline or trace over it with the color of the area that information technology crosses. For the final impact, trace all the fur with a sharp fine brush using chocolate-brown paint.
Congratulations for coming to the finish of our hamster cartoon tutorial! We actually hope that you take enjoyed the tutorial and that you are happy with your terminal drawing.
Oft Asked Questions
Can a Beginner Follow This Tutorial?
Absolutely, this tutorial is designed for employ past whatsoever artist who wants to know how to draw a hamster. Whether you are a beginner or an avant-garde creature drawing artist, yous can easily complete every phase of this easy-to-follow tutorial.
Why do You Utilise Construction Lines?
Construction lines are the best method for animal drawing because they help you nail the proportions and shape of your animal earlier you begin to add intricate details.

How To Draw A Hamster Pencil,
Source: https://artincontext.org/how-to-draw-a-hamster/
Posted by: eldredwoud1941.blogspot.com
0 Response to "How To Draw A Hamster Pencil"
Post a Comment